In the world of electronics and DIY projects, having the right tools can make all the difference between a successful prototype and a frustrating endeavor. For hobbyists and developers alike, finding affordable yet high-quality components is crucial. That’s where prototyping boards come into play; they provide a reliable platform for testing and refining ideas without breaking the bank. In this guide, we’ll explore the best prototyping boards under $15, showcasing options that cater to different project needs while ensuring you stay within budget.
Whether you’re a seasoned electronic engineer or just stepping into the realm of circuit design, choosing the right prototyping board can streamline your workflow and enhance creativity. From versatile breadboards to specialized development boards, our comprehensive reviews will help you navigate the plethora of options available on the market. With affordability in mind, we’ll highlight boards that deliver outstanding performance, ease of use, and flexibility, making it possible for anyone to turn their innovative ideas into reality without overspending.
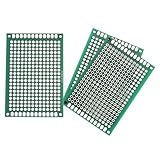
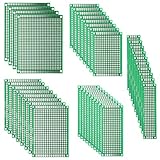
Before moving on to our review of the best prototyping boards under $15, let’s first take a look at some related products available on Amazon:


Last update on 2026-02-18 / Affiliate links / Paid Links / Images from Amazon Product Advertising API
Overview of Prototyping Boards Under $15
Prototyping boards are essential tools for hobbyists, engineers, and programmers alike, facilitating the process of designing and testing electronic circuits. These versatile boards allow users to experiment with different components and configurations without the need for soldering. For those on a budget, there are numerous options available that deliver quality and performance without breaking the bank. In this price range, the best prototyping boards under $15 offer a great starting point for both beginners and seasoned professionals looking to bring their ideas to life.
One of the most popular types of prototyping boards is the breadboard, which enables easy assembly and modification of circuits. Breadboards come in various sizes and layouts, allowing users the flexibility to create complex arrangements. Additionally, related options like perfboards and stripboards are also available, providing different methods for mounting components. Within the $15 price range, various brands supply durable and reliable boards, catering to a wide spectrum of electronic projects.
Many prototyping boards designed for low-cost applications also offer additional features that enhance usability. Some may come with integrated power rails or clear labeling to make the building process smoother, while others provide a variety of connection points to accommodate diverse components. Moreover, several boards incorporate features such as compatibility with microcontroller kits, ensuring that they work seamlessly with popular platforms like Arduino and Raspberry Pi.
Overall, investing in the best prototyping boards under $15 allows individuals to explore their creativity and indulge in their passion for electronics without significant financial commitment. As technology continues to advance, access to affordable prototyping solutions empowers a new generation of innovators and makers to bring their ideas to fruition, making prototyping more accessible than ever.
Best Prototyping Boards Under $15 – Reviewed
1. Elegoo EL-CP-003 Prototype Shield for Arduino Uno
The Elegoo EL-CP-003 is a versatile prototyping shield designed specifically for Arduino Uno boards. It offers a spacious layout with a plethora of soldering points, which makes it perfect for both beginners and experienced developers looking to create custom circuits. The board has a well-structured design that fits seamlessly onto the Arduino Uno, allowing you to expand your projects without the mess of loose wires. Additionally, the ease of soldering on this board enables quick modifications and iterations, enhancing the prototyping process significantly.
One of the standout features of the Elegoo EL-CP-003 is its compatibility with standard perfboard components. This feature makes it easier to integrate various sensors and modules into your project, saving time and effort during the assembly phase. The board’s durable build ensures that it can withstand multiple prototyping sessions, making it a reliable choice for anyone working on continuous projects. Overall, the Elegoo EL-CP-003 combines practicality and affordability, making it a top choice for aspiring makers.
2. DFRobot Gravity Prototype Shield for Arduino
The DFRobot Gravity Prototype Shield is an exceptional accessory for Arduino enthusiasts, priced affordably under $15. It comes equipped with an adjustable breadboard layout, providing ample space for various components to assemble your projects effortlessly. The shield is easy to mount onto your Arduino, and the clear labeling of power and ground connections helps reduce errors during setup. This attribute is particularly beneficial for those new to electronics, making it easier to understand circuit connections while fostering a solid foundation in prototyping.
This shield also features compatibility with the DFRobot Gravity series of sensors, allowing for seamless integration of multiple modules. The ability to connect several components without soldering each individually is a great time-saver. Furthermore, the sturdy construction of the shield ensures longevity and reliability during repeated use. With its user-friendly features and robust design, the DFRobot Gravity Prototype Shield is a fantastic choice for both beginners and experienced creators looking to experiment with their Arduino projects.
3. Seeed Studio Grove Base Shield V2
The Seeed Studio Grove Base Shield V2 stands out as an excellent prototyping board, especially for those who wish to use the Grove system for sensor integration. Priced under $15, this shield offers a hassle-free experience with a variety of Grove connectors that make attaching various components easy. It is designed to work seamlessly with Arduino boards, allowing for a straightforward interface where users can plug in their Grove modules directly. This simplicity significantly lowers the barrier for entry for newcomers to the world of electronics.
Moreover, the Grove Base Shield V2’s compact size makes it a perfect solution for projects with limited space. Its ability to accommodate many sensors at once is a major advantage, enabling users to build complex systems without the need for additional wiring. The board is constructed with durability in mind, ensuring that it can handle the demands of ongoing projects and experimentation. Overall, the Seeed Studio Grove Base Shield V2 is a fantastic, versatile choice for anyone looking to simplify their prototyping efforts while maintaining high-quality performance.
4. SparkFun Arduino ProtoShield
The SparkFun Arduino ProtoShield is a feature-rich prototyping board that caters to a wide range of projects. Priced affordably, this shield offers ample prototyping space along with pre-soldered headers for easy connection, making it a preferred choice for both hobbyists and professionals. The ProtoShield also integrates a battery backup feature, which is great for powering your Arduino projects during short power outages. This makes it particularly appealing for applications where power reliability is essential.
Besides its strong functionality, the SparkFun ProtoShield is designed with user customizability at its core. It allows you to easily solder components, add traces, and customize layouts without the constraints of breadboarding. The clear and concise documentation that accompanies this product enhances user experience by guiding you through the assembly and potential modifications. Overall, the SparkFun Arduino ProtoShield is an excellent investment for those wanting to push the boundaries of their prototyping capabilities in a compact and effective form.
5. Adafruit Perma-Proto Half-sized Breadboard PCB
The Adafruit Perma-Proto Half-sized Breadboard PCB is an innovative and flexible prototyping solution, combining the best features of traditional breadboards with the permanence of soldered connections. Priced well below $15, this board allows you to create a durable project that can stand the test of time. It features the same layout as a standard breadboard, allowing for an easy transition from prototyping to a permanent solution without relearning the layout. This is particularly beneficial for those who frequently move between the two styles of project development.
Additionally, the Adafruit Perma-Proto board is designed with plenty of space for all sorts of electronic components, making it suitable for various applications. The board comes with pre-defined power and ground rails, which help streamline the soldering process and improve organization within your projects. Furthermore, its high-quality PCB material ensures durability and good conductivity, while the matched holes help to secure components firmly in place. In summary, the Adafruit Perma-Proto Half-sized Breadboard PCB is an exceptional board that simplifies the transition from prototype to a finished project, offering convenience and reliability for all makers.
Why Do People Need to Buy Prototyping Boards Under $15?
Prototyping boards serve as a valuable tool for hobbyists, students, and engineers alike, allowing them to design, test, and realize their electronic projects. In particular, prototyping boards under $15 offer an affordable entry point for those looking to experiment with electronics without breaking the bank. Many beginners may not feel confident investing in expensive hardware, making budget-friendly options a necessity for fostering creativity and innovation.
The accessibility of low-cost prototyping boards encourages experimentation and learning. Users can explore various designs and configurations without the intimidation that comes from costly investments. These boards often come with all the necessary features for basic projects, such as ample space for components and easy connectivity for power and signals. Consequently, the low price point promotes a hands-on learning experience, enabling users to develop critical skills in electronics and programming.
Moreover, prototyping boards under $15 can serve as fundamental building blocks for more complex projects. Many hobbyists start with these affordable models as a foundation. As their skills grow, they can then transition to more advanced systems. Having an inexpensive option allows for trial and error during the learning process, and users can make modifications or repairs without worrying about financial loss. This iterative approach is crucial for personal and professional growth in the field of electronics.
Finally, the best prototyping boards under $15 are often community-supported, with forums and online resources available to help users make the most of their purchase. Knowledge-sharing and collaboration among users can enhance the experience, offering tips and troubleshooting advice that can be invaluable. This collective wisdom helps demystify electronics, making the equipment more approachable, and encourages newcomers to dive into the world of prototyping with confidence.
Key Features to Consider When Choosing Prototyping Boards
When selecting the right prototyping board, there are several key features that can significantly impact your projects. One of the most critical aspects is the board’s compatibility with various microcontrollers, sensors, and components. Ensure that the board you choose aligns with the hardware you intend to use, whether it is Arduino, Raspberry Pi, or other platforms. Compatibility will make it easier to integrate different elements and streamline your prototyping process.
Another important feature is the number of I/O (Input/Output) pins available on the board. A board with a higher number of I/O pins allows for more versatile project capabilities and the integration of various sensors and modules. This is particularly important for complex applications that require simultaneous control of multiple devices. Additionally, consider the size and layout of the board, as it should suit your workspace and the physical dimensions of your project.
Additionally, look for boards that offer expansion capabilities, such as the option to connect additional shields or modules. Expansion slots can dramatically enhance the board’s functionality and make it adaptable for various applications. Finally, power supply options should also be taken into account. Some boards are designed to be powered directly via USB while others might require external power sources. Understanding your project’s power needs will help you select the best board for your requirements.
Understanding the Different Types of Prototyping Boards
Prototyping boards come in several varieties, each tailored for specific types of projects and levels of complexity. One of the most common types is the breadboard, which allows for easy assembly and modification of circuits without soldering. Breadboards are particularly useful for beginners and educators, as they enable quick experimentation with various configurations. They are generally inexpensive and can be reused indefinitely, making them an excellent choice for introductory electronics projects.
Another popular type is the PCB (Printed Circuit Board) prototyping board, which is designed for more permanent circuit designs. These boards generally require soldering and are better suited for intermediate to advanced users who want to create reliable and durable prototypes. PCBs can be custom-designed for specific projects, allowing for greater creativity and innovation when developing a product.
Microcontroller prototyping boards are also gaining popularity. These boards typically integrate microcontrollers with built-in I/O capabilities, making them ideal for projects that require programming and digital control. Popular examples include Arduino boards and various clone models, which offer diverse features and a vast community for support. Each type of prototyping board comes with its unique benefits and life cycle, so understanding them can guide your choice based on your needs and expertise.
Tips for Maximizing Value in Prototyping Boards Under $15
When working with a budget, it’s essential to maximize the value you get from your prototyping board. Firstly, consider buying boards that come bundled with additional accessories or starter kits. These can include jumper wires, sensors, and even basic components that are often needed for various projects. A bundled kit can save you money in the long run and provide a more comprehensive introduction to electronics and programming.
It’s also beneficial to actively engage in online communities and forums dedicated to prototyping and electronics. Many enthusiasts share their experiences, project ideas, and modifications they have made to budget boards. By tapping into this wealth of information, you can gain insights on optimizing your projects and may discover new uses for your board that you hadn’t initially considered.
Moreover, look out for discounts and promotional offers, especially from online retailers. Seasonal sales, clearance items, and educational discounts can all lead to significant savings on your purchase. Finally, ensure that you develop a good understanding of the board’s capabilities and limitations, as this will help you make informed decisions in future projects, ensuring you get the most out of your investment.
Common Mistakes to Avoid When Choosing Prototyping Boards
When purchasing a prototyping board, it’s easy to make some common mistakes that can lead to frustration and inefficiency in your projects. One typical error is overlooking the specifications and compatibility of the board. Many beginners may hastily choose a board without verifying whether it aligns with their specific needs, leading to compatibility issues with sensors and additional components. Always check the documentation and ensure that the board supports the hardware and software you plan to use.
Another mistake is failing to consider the learning curve associated with different types of prototyping boards. While Arduino boards might be user-friendly for some, others might find them cumbersome compared to simpler boards. Take stock of your own comfort level with technology and select boards that not only meet your project requirements but also your expertise. Spending time learning how to use a more complex board when you’re just starting out could lead to unnecessary frustration.
Additionally, many users underestimate the importance of community and support systems when choosing a prototyping board. Popular boards benefit from extensive community resources, such as tutorials, project ideas, and user forums. Opting for less-known brands may save you money upfront, but could result in inadequate resources and support when troubleshooting issues or seeking inspiration. Make sure to research the level of community support available for any board you consider to avoid being left in the dark.
Buying Guide: Best Prototyping Boards Under $15
When embarking on a new project or enhancing an existing one, selecting the right prototyping board can be pivotal to your success. With numerous options available in the market, particularly under the $15 price range, the decision-making process can get a bit overwhelming. This guide focuses on essential elements that can assist you in choosing the best prototyping boards under $15, ensuring you find a product that meets your needs and expectations.
1. Type of Prototyping Board
One of the first considerations when choosing a prototyping board is the type. Common types include breadboards, PCB prototyping boards, and microcontroller boards like Arduino. Each type serves specific purposes. Breadboards, for instance, are great for simple circuit design and testing without soldering. If your project requires programming or involves components that need to communicate with each other, microcontroller boards might be the best choice.
There are also specialty boards designed for specific tasks, such as sensor development or IoT applications. Understanding the type you need will streamline your decision-making process and ensure that you select a board suited for your project objectives. Do a little research about how each type works and how it fits into the larger context of your project.
2. Size and Breadth of Features
The dimensions and specifications of the prototyping board matter significantly. Depending on the complexity of your project, you may require a certain number of inputs/outputs, as well as space for connecting additional components. Most prototyping boards come in various sizes, which can directly influence how many components you can accommodate.
If you’re working on a project that requires multiple connections or numerous components, do not underestimate the importance of a board’s size. A compact board might limit your capabilities, while a larger board can provide ample space for your ideas to expand. Review the technical specifications, including available rows and columns, to make sure it suits your planned system.
3. Compatibility with Components
Ensuring compatibility with your existing components is another critical factor. Not all prototyping boards work seamlessly with every kind of component. For instance, if you are using certain sensors, motors, or modules, you need to be sure that they can be integrated with the prototyping board you choose. Some boards are designed specifically to work with a wide array of components, making them more versatile than others.
Additionally, check if the board is compatible with popular platforms like Arduino or Raspberry Pi, as this can affect your overall experience and ease of use. A board that supports a wider range of components not only enhances flexibility but also accommodates future projects, allowing for seamless experimentation and innovation.
4. Build Quality and Durability
The construction quality of a prototyping board has a direct impact on its longevity and performance. While boards priced under $15 can sometimes feel flimsy, several manufacturers prioritize build quality even at lower price points. A solid board made from reliable materials will resist wear and tear during various prototyping sessions, ensuring it remains functional over time.
Durability also plays a significant role in ensuring a good user experience. A board that can withstand multiple component insertions and extractions without degrading maintains its performance level, enabling you to prototype without the fear of damage. Research the material specifics and read user reviews to assess the durability of potential buying options.
5. Availability of Resources and Support
Access to resources, tutorials, and community support can significantly enhance your prototyping experience. Some prototyping boards have extensive online communities and plenty of documentation. This can be exceptionally beneficial for beginners or anyone experimenting with new technologies. Having a wealth of tutorials, code libraries, and project ideas can serve as a great learning curve and help you explore the full potential of your board.
Look for boards that have a good reputation and vibrant community support. Platforms with active forums or user groups can provide troubleshooting assistance and creative ideas. A board with robust online resources can save you a lot of time and frustration, allowing you to focus on innovation instead of being sidetracked by technical issues.
6. Price and Value for Money
While your budget is capped at $15, understanding the concept of value for money is crucial. Not all low-cost boards offer the same features and durability; therefore, it’s essential to assess what you receive for your investment. Boards that come from reputable manufacturers often provide better longevity and performance, even if they fall within the same price range as lesser-quality options.
Evaluating multiple boards side by side can help you to ascertain which offers the best functionalities for the price. Sometimes, spending slightly more on a premium option can provide much greater returns in terms of reliability and features, which becomes an essential aspect of your overall planning. Make a wise choice by considering user ratings, features, and the warranties or guarantees provided.
Frequently Asked Questions
What is a prototyping board?
A prototyping board, also known as a breadboard, is a tool used for building electronic circuits without the need for soldering. It features a grid of holes that allow components like resistors, capacitors, and integrated circuits to be inserted and interconnected easily. This makes it an invaluable resource for hobbyists, students, and engineers alike who need to test and iterate on electronic designs quickly.
Prototyping boards come in various sizes and configurations, but they typically provide a versatile platform for experimenting with circuit layouts. They enable users to make changes to their designs on-the-fly and can be reused multiple times, making them cost-effective for both educational purposes and professional projects.
What should I look for when purchasing a prototyping board?
When looking for a prototyping board, consider factors such as size, layout, and compatibility with your electronic components. The size of the board will influence the complexity of the circuits you can build, so choose one that fits your project’s needs. Additionally, ensure that the layout and hole configurations match the components you plan to use, as this affects how easily you can assemble and modify your prototypes.
Also, consider the build quality and durability of the prototyping board. Boards that are made from higher-quality materials tend to last longer and provide better electrical connectivity. It’s beneficial to read reviews and compare different models to find one that strikes the right balance between price and performance, especially since you’re looking for options under $15.
Can I use prototyping boards for complex circuits?
Yes, prototyping boards can be used for complex circuits, but there are certain limitations to keep in mind. Depending on the size of the board, you may run into space constraints when building more elaborate designs. For larger projects, opting for bigger boards or multiple connected boards can help accommodate additional components and wiring.
However, working with complex circuits often requires careful planning and organization of connections to avoid confusion and ensure that the circuit functions correctly. Using color-coded wires or creating a schematic diagram can be very helpful in managing complex builds on a prototyping board. Keep in mind that as projects become more intricate, manual adjustments may require more time and effort.
Are there specific tools required for using prototyping boards?
While prototyping boards are designed to be user-friendly, certain tools can enhance your experience and efficiency. A basic set of tools typically includes wire strippers, small pliers, and cutting tools for preparing and adjusting your wires and components. These tools are essential for connecting leads and ensuring a tidy circuit design, which is especially important for minimizing errors in layout.
Additionally, a multimeter is a valuable tool for testing your circuit once it’s assembled. It can help you diagnose issues such as shorts or incorrect voltage levels. For more advanced users, soldering tools might be useful, especially if you plan to transition from a prototyping stage to a more permanent solution, but for basic prototyping, they are not necessary.
How long can I use a prototyping board?
Prototyping boards are designed for repeated use, and their longevity depends on the quality of the materials used and how they are handled. Cheaper boards may wear out faster and show signs of corrosion or damage after multiple uses, while more durable models can last for years under normal conditions. Ensuring that you handle the components carefully and not overstress the board beyond its rated capacity can extend its lifespan significantly.
It’s also important to periodically check the connections and the integrity of the board. If you notice any loose connections or physical damage, it may be time to consider replacing the board. Proper maintenance practices, such as keeping it clean and protected from moisture, can also help maximize its usability over time.
Can I create custom shapes with a prototyping board?
Prototyping boards typically come in standard sizes and shapes, limiting how customizable they can be in their physical form. However, you can create custom circuit layouts and configurations within that space using jumper wires and connectors. By strategically placing components and using wire connections, you can effectively tailor the circuit to fit your specific requirements.
For projects demanding unique configurations or integrations with custom designs, you can connect multiple prototyping boards together to expand your working area. This allows you the flexibility to shape your circuit design to match the specific dimensions and needs of your project while making sure everything is interconnected correctly.
What types of electronic components can I use with prototyping boards?
Prototyping boards can accommodate a wide range of electronic components such as resistors, capacitors, diodes, transistors, and integrated circuits. Many prototyping boards are designed to support standard pin spacing, enabling easy insertion of readily available components used in hobby and professional electronics. Additionally, you can also use connectors, sensors, and microcontrollers like Arduino or Raspberry Pi.
When selecting components, ensure they fit the board’s layout and electrical specifications. As you start prototyping, you may find you want to experiment with various components for features like automation or sensing, which can significantly enhance your projects. Just ensure proper documentation and organization to keep track of the components used and their connections on the board.
Verdict
In conclusion, finding the best prototyping boards under $15 can significantly enhance your DIY projects and educational endeavors without breaking the bank. With a multitude of options available, such as the versatile breadboards, compact perforated boards, and innovative mini-boards, each choice presents unique benefits suited for various applications. By considering factors such as size, usability, and material quality, you can confidently select a prototyping board that aligns with your needs and budget, ensuring a more efficient and enjoyable building experience.
Investing in quality prototyping boards is essential for fostering creativity and innovation, whether you are a seasoned developer or a novice enthusiast. The boards reviewed in this guide offer excellent performance and reliability at an accessible price point, empowering you to bring your ideas to life without financial constraints. By opting for the best prototyping boards under $15, you will not only equip yourself with valuable tools for experimentation but also pave the way for successful prototyping that inspires future projects.